顯示具有 3D Max 標籤的文章。 顯示所有文章

星期一, 11月 10, 2014

把 Eclipse 拿來當 3dsMAX Python IDE 的設定方式

3dsMAX 在 2014總算是有了 python,雖然很令人覺得難過…它的執行方式要透過 maxscript,但總也是好過沒有、或是自己還要另外安裝(Blur 的 Py3dsmax
另一個令人垢病的地方在於一直以來都沒有一個比較好用的 IDE 可以讓 TA 在開發時可以少死一點腦細胞。看看 Maxscript 的 debuger 就說明了這一切。所以大家無不想盡辦法使用其他的 IDE 來替代。
以 maxscript 而言,眾 max user 早就受其茶毒很久了, max 9 之前沒有語法提示,2008之後換成新一代以 SciTE 時大家眼淚都流下來了(再見了 mxscom.com ~, 再見了 N++ ~)
但是這種情況在 3dsMAX 2014 又再次上演了。
提供了 Python 卻不提供相對應的語法提示和語法上色的功能…(2008 的 dotnet 我們就不計較了…)
所以網路上就出現了拿 sublime 或是 pycharm 設定為外部開發工具的教學。
但是 pycharm 要錢才有 remote debug,sublime 本來就沒有我想要的 remote debug。所以我就用回了我比較熟悉的 Eclipse。

安裝 Eclipse

官網找一下,用標準版的就行了。下載完成之後解壓縮,放在你想放的地方。看要在 C:\ 或是 D:\ 都可以。
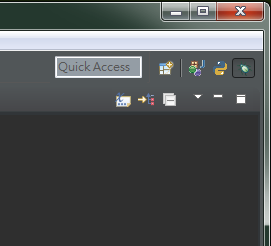

安裝 SmartGit/Hg

(你要用 MyGit 當然也是 ok ~ 請由此去)
一樣我們到官網去把東西抓下來安裝即可
(可能要裝一下 JRE ,就不多寫這一步驟了)


安裝相關 Python 模組

接著就可以用 SmartGit/Hg 來安裝我們所須要的模組了。好佳在,其實最難的事有人已經幫我們做好了,就是怎麼跟已經開啟的 3dsMAX 連結。

請至下面這個網址 https://github.com/arturleao/YCDIVFX_MaxPlus 在右下方有個 HTTPS clone URL ,把這裡的網址複制下來。
打開 SmartGit/Hg

選 File 下的 Clone

把剛剛的網址貼上
看要放在那個位置

PyDev

好~ 再來是 eclipse 的部份。 在 eclipse 要安裝 PyDev 這個 Python 開發外掛。

打開  Eclipse 到 Help 下


執行 Install software


按下 add,在 Name 的欄位寫個名字(自由發揮)
Location請打上 http://pydev.org/updates
就可以按 ok 鈕了


把找到的二個項打勾,按下 next 安裝吧,安裝過程中會要求你接受他們的授權。多按個幾次按鈕(next)就把他裝完了。

設定專案

東西都裝完了,可以開始測試我們想要的 Remote Debug 了
開啟新的 Python 專案

先把我們的 Python 環境設定好,按上圖中藍色部份的連結


按下 Add 把 max 的 python 設定加入


按下 New 把 max 的 python 設定加入


加入相關的 Lib


按下 New Folder,加入 YCDIVFX_MaxPlus 這個我們之前藉由 smartGit 安裝的模組。
還有另一個重要路徑也要加入的是 3dsMax 2014 安裝的根目錄。


這樣我們就可以在專案設定時選用我們剛剛建立的 Python 直譯器設定


Pydevd 模組

到 windows \ preferences 裡的  Pydev \ Interpreter \ Python Interpreter 下選好 3dsMax 2014 ,再下方的 Libraries 頁標下按 New Folder 按鈕,把 pydev 套件的位置加入,我的位置路徑如下(僅供參考)D:\‧‧‧‧\eclipse\plugins\org.python.pydev_3.6.0.xxxxxxxxxxxxx\pysrc


加在這裡主要是讓 Eclipse 不會跳出找不到模組訊息的警告,而且也有自動完成可以用。
在寫程式的時後還是要再加入 sys.path 中。因為我們最後是 max 要跑的,不會是用 Eclipse 來執行的。

建立一個 PY 檔,我們就叫他 test.py 好了,內容簡單一點,就像下面這樣就好了
import sys
sys.path.append(r'D:\Dropbox\green software\eclipse\plugins\org.python.pydev_3.6.0.201406232321\pysrc')
import pydevd
import MaxPlus
pydevd.settrace()
print MaxPlus
之後跳到 debug perspective 開啟 debug server

可以直接按下右上角的那個小蟲子打開 debug perspective

再來按下上方工具列的 start the pydev server

到下方的 console 找他回報的 port 號碼,沒意外的話應該是 5678 這數字

debug 頁標裡的內容多了 Debug server 了 XD


再回頭來把程試碼加寫一些東西

pydevd.settrace()
改成
pydevd.settrace(host='local_ip', port=5678, suspend=True )
那個 local ip 請自已替換成你的 ip 如 192.168.0.2 之類的

Link To Existing Source

為了讓他可以在 max 裡跑我們要借重上面提到的 YCDIVFX_MaxPlus 模組,這時應該已經抓下來了才是,但是為了在目前的專案可以引用我們還要跟 Eclipse 說一下它在哪裡。

在 explorer 視窗中對專案按下右鍵,依圖示選至 link to existing source
再來選取相關位置(圖裡的路徑供參考)

再來就可以設定 RUN 了,利用 run 指令只是為了讓 Eclipse 幫我們快速的做出一個 configuration,還要再去改裡的設定,


利用run ,快速的做出 configuration (圖做的有點誤差,是上面那個指令)

再選擇 run configurtaions 進入設定視窗

把第一個頁標的 Main Module 的檔案路徑改到第二頁去,前綴 -f


再把本來的  Main Module 改成 YCDIVFX_MaxPlus 目錄裡的 run.py
現在真的可以 run了~
確定一下 debug server 有開,切到 debug perspective
恭喜,你現在可以在 debug perspective 裡一步一步的執行程式碼了~


看右邊那滿滿的執行時期資訊完全是 maxscript 辦不到的啊~  > U <

後記:自己做的時後很快,但是要寫出來就花了很長的時間,而且還要一直來回勘錯 冏…

星期四, 5月 15, 2014

NAB 上講解的 3ds MAX 2015 新功能

影片:3ds MAX 2015 新功能解說由此去

大家都很關心有什麼新功能。
這裡有個45分鐘左右的影片,看了一遍,分成三個大段落,利用了客戶提供的檔案,用類實戰的方式來帶入新功能講解。
個人順便把重點節録如下:

其實 3ds MAX 2015 是為忍者而生(誤)

  1. Fast for layout 
    • spacing tool
    • asset browser 跟 placement tool 協同作戰
    • object paint (舊功能) 多了個 paint on painted object 選項
  2. It is great If you have to fix something quickly
    • 整合後的場景管理工具 (連 layer 也包了,現在可以做巢狀管理)
    • 可以開二個一起 dock 在某一邊,快速的整理( ex:parent, select... etc )感覺很屌。
    • state set 可以用特殊語法來自動命名 ( 在 rendering dialog 也可以用 )
    • state set 增加了對應 render element 的 composite node,並且會自動設定好 render element 的合成模式
  3. When you know it, you can fake everything
    • 好像沒有講新功能…


好了…你不用浪費45分鐘看了…

星期一, 8月 05, 2013

MAX XML 使用筆記

  1. 主要使用類別
    xml = dotnetobject "system.xml.xmldocument"
  2. 指定用的檔案
    xml.load "c:\\1.xml"
  3. 新加節點
    newNode = xml.CreateElement "這是節點名"
    newNode.appendChild newNode
  4. 改變節結文字
    newNode.InnerXml = "節點中的文字"
    或是
    newTextNode = xml.createTextNode "maxObjName"
    newNode.appendChild newNode

  5. 找節點名為 "node1" 的特定節點
    xml.SelectSingleNode "//name[.='node1']"

    這部份要參照 XPTAH 的寫法

  6. 回存
    xml.save "c:\1.xml"

星期四, 3月 17, 2011

filters struct

寫script時常常會須要用到判斷這東西是不是一個某某物件或是某某類別
通常就是自己用 classof或是iskindof
不過其實max有寫了一個 filters 的結構體,寫的完整許多,可以直接拿來用。

用法大致上是這樣

b1 = box()
select b1
filters.Is_EditMesh()

就可以了
要判斷的物體是要選取的而不是用傳參數的,這點跟我自己的用法有點不同。不過這種用法執行速度好像比較快…

其他的還有像

filters.Is_EditSpline()
filters.Is_EditPatch()
filters.Is_EditPoly()
filters.is_MeshSelect()
filters.is_SplineSelect()
filters.is_PatchSelect()
filters.is_PolySelect()

等等的,有用到的人可以去
C:\Program Files\Autodesk\3ds Max 2011\stdplugs\stdscripts\filterfunctions.ms
查看原始碼~

星期五, 1月 29, 2010

importons 和 Irradiance Particles

暗…好久沒發文了說…也不知道要發啥,有了plurk之後就一直在噗…都沒在寫 blog…最近翻了一篇文。是跟mr有關的,有興趣的人就看一看吧。英文高手們就不要來亂了…

==以下是翻譯文===========================================

mentalray 3.6 +新增了importons和發光粒子功能。
這裡一些測試和說明。最後~你需要有一個 geoshader 以啟用這個新功能。
Importons是執行計算為主導的抽樣貼圖。(不知道怎麼翻)
它們可用於為主導的光子映射功能,作為合併的光子。
也就是說,光子接近 importon 將被保存到貼圖上,其他的就直接捨棄。這將導致光子地圖的資料量大減,但卻很精確,因為我們直接捨棄對最後成像沒有很大的影響的光子,因此我們有更多的光子密度分佈在我們需要的區域(好吧,光子不是真正的'捨棄..當一個光子被丟棄,其能量被重新分配給附近的光子)。
為了讓 Importons與光子合作,你必須設置global.illumination捲廉下的merge參數為零,也要在importon捲廉下設其 merge參數為"非零"的值這會告訴mentalray使用Importons合併光子,而不是一個固定的合併距離(如果gi捲廉下的merge參數設成非零值)。
Importons在importons階段被射出,此一階段發生帶光子射出之前。一旦光子貼圖保存好了。 Importons就被捨棄。在verbosity中,你會發現有多少光子合併以及有多少被保存到貼圖上。如果使用'density'參數,則 Importons發射取決於render的解析度大小,也可以用'emitted'參數任意的發射。
當使用Importons與光子地圖,'traverse'選項要勾選。在這種模式下Importons不會被物件阻擋,會持續繼續計算任何進一步交叉區域的重要點。
最通用的實作Importons方法就是打出了大量的光子。光子的問題不在於發射光子而是光子貼圖:如何取得、平衡,儲存和相互共享。
一般來說,在32位元的作業環境下,存儲多於1千5百萬的光子在一張貼圖,還是有些問題。首先,貼圖可能大到200/300mb或是更大,mentalray會在試圖保存貼圖之前先最佳化它…然後mental ray就會就當掉。現在讓我們回到問題點上,為什麼我們要發射1千5百萬個光子…?
一般來說處理光子時有如下二個技術手法。
在大體的的燈光情況下使用一個底解析度的光子貼圖,然後利用FG來得到細節的部份。
利用高解析度的光子貼圖來準確地處理打光的細節,然後利用FG來產生接觸的陰影等等的細節。
現在,我們有第三個解法。
我們可以用光子與Importons合作,就可以達到有準確的光子反彈、進而收集到很小的細微的細節。
舉個例子。
我在一個封閉的box裡發射了5百萬個光子。
光子發射計算時間不超過30秒。
我的工作平台是在二台雙核心分佈式算圖的環境上。
光子貼圖算好了,它的大小約為102mb。這剛好是我DBR渲染所能負荷的極限了。我要等待貼圖被傳送到第二台電腦上,雖然我的場景案很小。最後等我第二台電腦拿完那個1、2百mb的光子貼圖時,第一台已經render完成了。就…浪費了渲染的時間。
再來看看結果,那些我們用光子貼圖產的經典render圖。就…很low的細節,只要看看盒子下方的暗處,那個影子有多不自然。
http://img377.imageshack.us/img377/485/impphotonysd6.png
現在,我們可以嘗試使用Importons。全密度。和merge參數為0.05(公分,而光子半徑是1公分)和勾選traverse。
http://img379.imageshack.us/img379/6163/impmergingverbosityzd1.png
光子貼圖現在是3861kb。
如上述,,我們可以看到只須要有約200.000光子分佈於重要的、對成像影響較大的區域上。由於光子的分佈是以importance為基礎的,我們打出了足夠密度的光子用以涵蓋所有的區域,以便當通過importons合併後,仍然有足夠的光子可以取得細節。只要看一看立方體的陰影,沒有用 importons和有用importons的差別。
http://img74.imageshack.us/img74/6382/impphotimplc2.png
(編輯:由於importons用於合併光子,用完就丟,只有光子貼圖會被保存下來。這意味著,可以用maya的 photon map visualizer在視埠中直接看到有用importon跟沒有importon的photon分佈情形。 :)
================================================== =============================================
此外,我們也可以單用Importons、不跟光子、發光粒子和用。
Beside the fact,你需要一個最小量importons來得到平滑的成像,在這裡最重要的參數(跟之前和光子貼圖同時開啟時是merge,在這情況下則被忽略)是跟踪深度。舉例~我們需要讓很多importons在場景中反彈用以得到一個完整的遍歷場景的importon貼圖。先把density 參數設為0.2之後可以向上調升。對於Depth 這個參數以2為起啟值。
發光粒子。
讓我附上mentalimages怎麼說明這個'新'的技術:
'有一段對於技術上的簡短說明:在渲染之前,
importon從攝影機視點被發射出來。他們撞擊到場景中的某點,該點帶著在那一點位置上它光照的強度資訊(當然,也有可能是間接照明
,也因此稱為“發光粒子”)被合成到一個貼圖之中。
一個間接照明pass或是多個間接照明pass,都可以計算。
演算法的本質上是以 importance-driven。在
rendering時期,發光粒子被用來計算每個成像點上的光照
;如果發光粒子只有收集到直接光照,那就
相當於一個反射的間接照明。光照也可以
在粒子的位置預先計算插值。'
參數的部份就跟FG很接近。
有一個要在粒子採樣點上預計發射多少光束量的參數。
有個在粒子的位置計算插值的方法(也有針對第二次反射的)和另一個模式。即、沒有沒有使用插值時會像brute force法來處理。
Passes 參數代表著計算光照強度時會考慮幾次的光線傳遞(反彈),就像是FG裡的diffuse bounces參數。
最後,如果您有一個環境,像是mr_sky,發光粒子將支持另一組採樣參數。
這裡有一些用來說明新功能的圖組
只有在第一張圖片完整的使用了importon + irradianceparticles。其他的只是保留了計算完的結果(GI mpas),然後再次下 render。在計算importon + irradianceparticles時花了約30分鐘,之後的每一張約花3分鐘(render大小約為1k)。
http://img396.imageshack.us/img396/2710/shot001rg2.png
http://img120.imageshack.us/img120/6391/shot060hn3.png
http://img72.imageshack.us/img72/8105/shot0109ut1.png
(importons密度0.5,depth4; irradianceparticles,680rays,2張,32interp,480envrays)
這裡有一段動畫可以看出 Irradiance Particles 有效減少閃爍的現象。
這是設定為中等細節後計算出的結果。雖然在陰影的部份仍然有一些班點。但是,這些班點不會閃爍,因為沒有每個frame都重新計算。(捆紮配備了網頁壓縮)。
http://rapidshare.com/files/107992908/output3.mov.html
================================================== =============================================
另一個特點是配備了mr3.6 +是一種先進的幀緩衝記憶體管理。說白一點:快取模式。當您在快取模式,可以render任何尺吋的圖像(甚至在32位上)。實際上,如果啟用,只有一小部份render完成的的圖像(或是說用使者的framebuffers)是存在於記憶體之中:newly rendered tiles and tiles recently accessed。
這個模式應該只用於btach渲染(如果在maya內用render view又打開快取模式,maya會掛點…不過…在viewer裡render大尺吋的圖好像也沒啥意義)。我剛剛在32位系統上render完一張 20k的圖,存成32bit。比其他方法慢,這個模式應該只用於如果mental ray 沒辦法建立一個很大很大的framebuffer(一般來說在32位元系統上是指超過4K的圖)。
鋼筋混凝土0.2信息:選項:蛋白原號負責管理緩存
鋼筋混凝土0.2信息:選擇:圖像類型插
鋼筋混凝土0.2信息:0 rgba_fp是
鋼筋混凝土0.2信息:相機:焦距1.37795
鋼筋混凝土0.2信息:相機:孔徑1.41732
鋼筋混凝土0.2信息:相機:方面0.8
鋼筋混凝土0.2信息:相機:第16000 20000
================================================== =============================================
二個注意事項在於使用Importons+發光粒子和Maya2008SP1。
不要用任何maya內建的shader:
'Suppress all Maya Shaders'這個選項記得勾選。在 shading engine 節點(mia_material)中的'Export with Shading Engine',這個選項要不要勾選。
上述檢查事項也要對燈光做一次。'Suppress all Maya Shaders'選項要勾選,要提供自定的 light shader (MR sky protals不錯用)。
最後,在render setting中,到 Translation->Customization中把'Export State Shader'的勾選取消。
最後~~如果想要更進一步的描述和參數說明,請閱讀軟體手冊中 geoshader 一節。
也有64位版本(刪除.X64的後綴)。
祝你玩的愉快!
Max

dagon1978

2008年4月21日,下午3點27

不錯,但老實說,我看不出跟這樣跟使用FG+GI加上AO和色溢有什麼差異。
你可以用skyportals得到物體交接處的陰影,這陰影還是area lights把室外的環境光傳遞裡室內得到的結果,如果你再把這結果拿來跟AO做出來的色溢混合還可以得到更進一步的結果,帶有色彩的物體交接處陰影,這樣的處理手法會導致後我們得到跟用發光粒子和importons這個手法一樣的結果。
而且更快~
我認為在 interpolated IP 你是正確的。
我想多說一些關於這一點,我認為暴力計算IP是一個很大的改善(比FG跟path tracing的暴力法快多了,甚至偽一體化),但我也對這種功能未來的方向擔心。
OK,現在我們有一個很好的起點(importons),它們公正呈現(或者類似這樣)renders 。為什麼不考慮看看漸進跟踪(像是在VRay裡的lightcache和PPT ...而明年他們有一個新的互動/逐行的render引擎基於此)?
就是我想說的是:我們不能從mr的開發者那裡得到回應、互動,我們看不到未來mr新功能的方向在哪裡,這肯定是不好的,因為很多時候他們不會採取對user正確的方向,恕我直言。
mental ray的開發者們,你一定要聽user的需要,如果你想進步!拜託!
現在,從另一面想,我們有ZAP(mr大濕(誤)),所以我可以跟他談論著色,我真的相信他把所有我們所提的意見認真的考慮過,我看得到這一點的好處,現在我們在mr的shader 整合上有很好的成果,這正是目前mr所展現的成果。
另一頭,我們有核心開發(我可以裡批評很多,但我想要有點建設性),那為什麼不能有一個論壇(拜託,都2008年了!),甚至mray網站上的資訊都非常落後(mray 3.3的資訊?噢,我的...)
然後我看的到後果,...需要很多功能,也增加了一些新功能,但沒有一個有說服力...
好~再回頭想想 interpolated IP,我真的希望在下一版本做到更好,但嘿,回顧過去的問題(我說的是FG 3.5版時的 interp 問題,從第一天我用mr 3.5 上工就遇到這個問題,直到現在都沒改進…3年了耶…?)這難免令我有點擔心...
現下,就我可以理解的部份(我不是技術人員),有一些IP機制本身的錯誤,我指的是 IP 計算內插這一部份。
對光子(phootn)好的開始是:(和lightcache,所有好的演算法中的二次射線)如果你需要一個插值解法,您可以用一個平穩和快速計算的二次射線的散射光,並用良好的主射線演算法來添加細節(在mr就是fg,在vray就是irradiance cache)
現在的IP:您可以射出importons為主要射線和二次射線,但你不能單獨控制其中一項要品質!
恕我直言,這對IP及其插值計算這是大問題,如果你想有一個良好的 GI 就要射出很多importons,許多importons =要射算大量的射線,射算大量的射線+很多importons =很長的 rendertime。現在你可以有一個近乎完美的interp IP算圖。但rendertimes非常接近沒做interpolated 解法的!
在未來幾週我會做一些比較,這樣您可以比較容易看到。
因此,如何解決?
恕我直言 就是分開主要次要射線的控選項!所以有兩種方法可以選擇:有光子+FG的方法(原本mray方式),和另一種VRay(和海龜和FR和邊疆區...)式,在核心裡獨立主要和次要射線!
這三年來我一直試著要求要有這個功能...我不明白,為什麼從來沒有聽有人說過它!烏龜(另一個renderer)的開發人員細心多了!因此,也許mray核心的一些技術限制導致你無法做這個改變,但是可以讓我們知道。後找尋另一種解決的辦法。
我不希望把這些討論開在另一個討論串,Max,希望你們能明白我想說的東西,我不是要批評開發人員,我希望這麼做有建設性,我想要給你們user的回應,我想做要求新功能等
但如果你不喜歡這樣的言論,我可以殺掉這一篇,並開啟另一個討論串...
thanx
mat

==翻譯結束===============================================

之後我再補上mr help裡關於 importons跟 Irradiance Particles的中譯

星期二, 3月 10, 2009

批次去掉 dds 的 mip map

我不知道為何我們須要做這個步驟…
正常來說不是有mip map比較好嗎…

反正規格是死的,遵守就對了。

我找到的方法如下:
請到nvidia的網站上下載一組叫 DDS Utilities 的工具,安裝完成之後會在程式集裡多出現 NVIDIA Corporation \ DDS Utilities 的資料夾
dds01

裡面有nividia所提供關於dds檔案格式的命令列工具。
我們會用到的是 detach.exe 這個工具。

detach.exe 文件裡寫的用法是
detach filename.dds

但是如果是照文件裡的打下去反而不行,請把副檔名拿掉,變成
detach filename
就可以了

成功之後他就會把該dds檔的每一階mip map變成單一個檔,並在後面加上 _?? 的編碼做區分,而編號 _00 這一個檔案就是我們所要的檔。

-----解說完畢的分格線------------------------------------------------

當然,我們很少是處理單一個檔。通常是一大批…
我個人自然是用maxscript來做這件事。這一部份就看個人愛用的程式語言了…
還有另一個辦法是利用photoshop的批次來做,但是量越大,我想速度的差異就會跟命令列的方式來的愈趨明顯。

星期一, 3月 31, 2008

unlock shader and MR SHADER - color mix

撇除mr有些shader還不是很穩定這個問不說,其實mr有很多shader還是很好用的。


在max的 add help 裡可以看到有個 mr 3.6的 help,裡面列出了很多有的沒有的shader,但是奇怪了。為何我們在max切換成mr renderer時都看不到…?


因為mr預設是讓這些shader"隱藏"起來的…
所以我們要自已去把他"弄出來"


弄出來的方法如下,我們也剛好拿 color mix來做示範~


先到max root \ mentalray \ shaderS_standard \ inclde \
找到 base.mi

location


用筆記本打開他,在裡面找到 color mix對應的shader介面部份,把本來的"hidden"的那一排在最
前面加上#這個字。(表示把他註解,這一行就無效)

basemi


存檔、開啟max、切成mr、在材質編輯器中找個difuse貼圖按鈕按一下,你就可以到 color mix (base)這個 shader 了。


他的介面很長,不過主要就是

num of clor:要開幾個cahnnal來用

mode:第n個channal 的 模式設定

weight: 第n個channal的權重值(有像是透明度、可貼圖)

color :第n個channal的rgb值(可貼圖)

只是介面列出了8個channal,所以看起來很花,其實就是這樣子而已。
比較難懂的是mode這個參數。他主要是控制channal間的合成模式。
這個mode值的設定在help裡有寫的非常的清楚。如圖

modeList


以上~~~~~


後記:其實 mr 裡還有很多很好玩的shader,希望大家也能用上述的方法解出來,試著去玩看看~
主要是 mr 是內建的,多學不吃虧。而且這些shader是學一套在三套(maya xsi max)裡都可以用的,我個人認為很值得投資時間下去學習的(如果你已經開始有想跳軟體的話…)。

星期一, 3月 24, 2008

不小心看到的MAX 2009

有人拿到…

有個朋友因為某種原因拿到了max 2009。對我們這種跟max有很深的革命情感的人(從dos版的r4用到現在),一定是非常希望能在第一時間內就知道max2009的新功能。

所以我迫不急待的問他有啥新功能,他說他也是剛拿到,才剛安裝完,目前知道的是max的預設render改成mr了。再來是視埠上多了像maya那個可以切換viewer的正方體,還多了一個圓形的ui,有點像是zbrush裡控制stencil的那個介面。也是寫著 front,left…等等的viewpoet的名字。

目前所知的就只有這3點…希望他今天上線之後我還可以再問到新東西…

目前的感想…

好像還是早早準備換另一套軟體好…( xsi 我來了…)

跟之前的版本一樣,換了個大改版…這次還提高了價格喔~
但是新增加的功能少的可憐…就目前所知道的這三個改變,第一個…不過是預設改成mr…第二、三個也只是花俏的東西。感受不到一個應該是從2008變成2009版該有的提升…(上個版本也是這個樣子…冏)

我拿max主要是拿來做人物動畫…但是這幾版的max在這改面的改進真是少的哭爸的可憐…

星期三, 4月 06, 2005

max開啟時自動載入特定的material lib

Q:Is it possible, when Max starts, to load a specific matlib?

A:. You can copy your library to the folder C:\3dsmax7\Defaults\MAX and rename it to be called MEDIT.MAT (rename your original MEDIT.MAT to .BAK or something) and it will be loaded automatically when you start Max.

星期日, 3月 27, 2005

香港的CG網站比賽角色


Dragon skeletch head Posted by Hello
這是參加香港的CG網站辦的比賽的草圖


Dragon skeletch full Posted by Hello
全身的草圖


colour sketch Posted by Hello
色稿


head wip01 Posted by Hello
頭部實作01


body wip01 Posted by Hello
身體實作01

2005 0215~
---------------------------------------------------------
目前還是持的在更新當中,如果想看最新的進度。請至
--->不發火的香港CGVS怪獸比賽<---

星期三, 3月 23, 2005

MAX Scripts How to


問: Querying a material type, i.e Composite, Standard, Blend etc
如何辨別材質的種類

答: for m in scenematerials where classof m == compositeMaterial do


      --your code here...
2005.03.23


問: how to set a Keyframe via MAXScript as I'd like to animate lights multiplier property

如何用maxscripts來設定光物件的keyframe
答: the easiest way is to tell MAXScript that you want to animate values, and it will create keyframes for you.


For example,


$Omni01.multiplier = 2.0


will set (without animating) the multiplier of a light called Omni01 to 2.


To set a keyframe on the CURRENT frame, you would say


with animate on $Omni01.multiplier = 2.0


This does NOT press the AutoKey button in the UI, but tells MAXScript to do the equivalent of enabling the AutoKey button internally. Any changes to values you do in the context of with animate on ( ) will be keyframed.


If you want to specify your times, you can do this using the at time context.


theLight = $Omni01

with animate on

(

at time 10 theLight.multiplier = 2

at time 25 theLight.multiplier = 10

at time 100 theLight.multiplier = 1

)


this will set keyframes on frames 10, 25 and 100. If there was no keyframe on frame 0, it will be created, too.
2005.03.24

持續更新…

星期五, 3月 04, 2005

How to Control CS by eular XYZ controller

This figure discribe how to control CS use eular XYZ controller.
The point is enable SUBANIM icon. this allow CS to use sub-contorller which you assign

How to ... Posted by Hello

星期三, 3月 02, 2005

ZB 官方站上關於用max render的筆記

testing with vray

-import obj
- apply a meshsmooth modifier to the object
- aplly a vray displacement modifier
set an amount of 8 and a shift of -4
resolution to 1024
render in 720 576 in 9 sec


ZB test Posted by Hello

Another vray test.

The displacement values here are

13.344 with -6.672 shift

These values are based on the displacment value given by pixolator and the autoscale value in the OBJ (use a text editor to open the file, it is in the header), there should be no need to guess this. I'll put up a zscript/maxscript combination to do all this automatically once I have put a simple interface on it.

ZBtest Posted by Hello

3DS MAX, Scanline - nimajneb

OBJ file to Editable Mesh.
Meshsmooth, 1 Iteration
Collapse to EMesh
Set Sub-D Displacement, Medium Preset (High Kills it, on my box)

Set material Bump and Displace same map (instanced). Set level to 100, and instead, change output to remap iamge from -.5 to .5. Set overall output to taste (I did the reciprocal of .834, 1.2 approx).

45 sec to render.

ZBtest2 Posted by Hello

Max 6 + Mental Ray - Zeddicus

- Displacement map flipped vertically and resaved in Photoshop as 16-bit RGB TIF file, no compression, no color management applied or embedded profile.

- Map loaded into material editor slot as bitmap, blur 0.01 (doesn't seem to matter with MR which ignores it, but good habit anyways to prevent banding if you use another renderer such as Vray), RGB offset -0.5 (map will look black, but it's not really and negative displacement is still there). By the way, if you didn't flip the map in Photoshop, set V tiling to -1.0 so that it renders properly.

- Using a second slot in the material editor, I applied a standard material with mental ray displacement shader unlocked (see heading mental ray Connection near bottom) and displacement map instanced as the extrusion map. Object Independant: checked / Displacement Length: 1.0 / Extrusion strength: 12.0 / the rest at default.

- For render options - View: Checked / Edge Length: 1.0 (higher speeds thing up but lowers render quality, lower setting slows things down but improves render quality) / Max Displace: 15.0 / Max Level: 6 (play around for best speed to render quality ratio)

Note: If you get a log error about your displacement map, make sure it's a proper 16-bit RGB TIF as stated above. 16-bit greyscale works, but gets converted to RAW and also is more likely to show banding.

The render posted previously in this thread (render time 1:40 at 640x480 / default render settings used except for those that were displacement related / two omni lights using shadow mapping):

ZBTEST3 Posted by Hello

心得 - mangriff
Yay!! I finally figured out how to get really good displacement maps in MAX!!! With default scanline settings. It works great, animates great, looks great and is faster than SH$$$$ yay!! Oh excuse me i have been struggling with this for the past few days sans sleep, food, blah blah blah. Cool, well here is the pic! PLEASE if anyone has questions ask me and id love to share the steps and settings! ooooOOooooweeeEEEEEEEE!!

First things first. DISABLE displacement in the render dialog! Everytime i forget about that the system crashes and poop pours out of every drive like a toilet rebelion. But seriously i got the best results both in control and results using the modifiers only. So import the mesh. Add turbo smooth with the iterations in the render so that the view port isn't bogged down with the smoothing. You can put on like 1 or 2 iters in the viewport just to see and judge how it's all going, and then put like 4 or if you can 5 in the render dialog for the final deal. Open the material editor and apply an open material to the mesh. In the material's displacement map import the tif file. You can import the file in any map slot because we are not using the displacement of the actual material, but we need to adjust the tiling so you can't just load in the image as an image. If you want you can just change the material slot to be a 2d map only and reference that, but since i figure you would want to a "3d" material on the guy anyway eventually it works to just bring it in the in displacement slot (that is the use after all). ANYWAY, change the V tiling to -1 instead of 1. because the map is flipped around the V axis. Now the map is ready to be applied to the mesh. Next you add the displace modifier in the stack and adjust the strength spinner. Make sure you turn on the luminance center and leave it at .5 (this makes it so that the mesh doesn't inflate completely and basically sets 50% grey to be the default condition, so white will protrude and black will recess which is what we want). under image, choose "MAP" and when the map chooser pops up find the image in the MTL Editor "browse from" choice. This uses the map that we inverted along the V for the displacement. The mesh should deform, if not then you may need to up the strength a bit. That's it. I made a morph target to show that the low poly version can be used to deform the high poly form for animation or posing. Lighting is just a couple omni lights that i rigged in the traditional 3 pt lighting theory. That's about it i think, let me know if something doesn't make sense and/or if this works for you! Later

有關於alpha depth factor 的解說 ~ 超棒!